Acoustic Assistant

Early access - opening soon

Tired of failing the car test?

Most mixes don't translate because the room is the weakest link. Bass response at your listening position is uneven, reflections smear your stereo image, and what sounds great on your monitors falls apart in the car. The Acoustic Assistant designs speaker placement and treatment for the room you have.

We'll keep you updated when it launches
Stacktune Acoustic Assistant
  1. 1.Diagnose

    Find out exactly why your mixes don't translate.

    The assistant identifies the specific problems in your room.

  2. 2.Reposition

    A more accurate listening environment, just by moving things around.

    Get ideal speaker and listening positions for your room - stereo, surround, or Atmos.

  3. 3.Treat

    Find out what acoustic treatment you actually need and exactly where to put it.

    Place treatment where it works best. If you already own panels or traps, the assistant tells you whether they're in the right place, and what to add if not.

What you get

Like a personal acoustic consultant for your room.

The assistant delivers what a studio designer would: findings, speaker coordinates, treatment placements, and a plain-English report - calibrated to your room's geometry.

A clear list of what's wrong with your room

Every problem is named, ranked by severity, and tied to what you'll actually hear. No more guessing whether 'muddy low-end' is your room or your mix.

Findings
  1. Modal buildup at 38 Hz at the listening position

    The listening seat falls on a peak of the room's 38 Hz axial mode, building up bass and masking kick fundamentals.

    Critical axial-mode
  2. Untreated early reflections from side walls

    Stereo imaging is unstable on dense mixes. First reflections combine with the direct sound and smear localization cues.

    High comb-filtering

Optimal listening and speaker positions

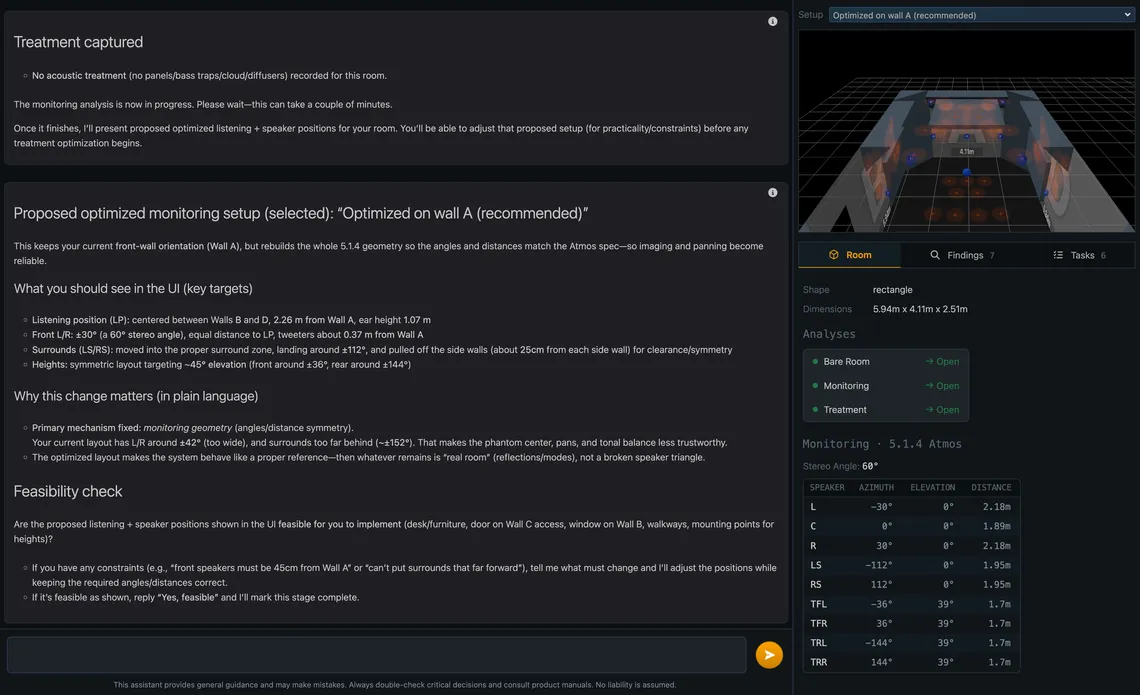
Better sound without buying anything. The assistant calculates where to put your seat and speakers for your room's geometry, including multi-speaker Atmos setups.

Speaker positions
SpeakerAzimuthElevationDistance
L-30°2.18m
C2.18m
R30°2.18m
LS-110°2.18m
RS110°2.18m
TFL-45°45°2.18m
TFR45°45°2.18m
TRL-135°45°2.18m
TRR135°45°2.18m

Treatment placed where it will actually do something

Where to put the treatment you already own for maximum effect, plus exactly what to add next - each piece placed to fix a specific problem in your room.

Recommendations
  1. Place broadband side-wall panels at first-reflection points

    Two 600×1200 panels with 5 cm air gap, one on each side wall, mirrored at the calculated reflection point.

    High existing-inventory
  2. Add a ceiling cloud above the listening area

    Single 1200×1800 cloud, 10 cm air gap, centered over the seat. Targets the strongest small-room reflection path.

    High add-next

Every decision explained, in plain language

Every finding traced from symptom to fix: what you hear, why your room produces it, exactly what to do about it, and what to expect after. Plain language, with the physics where it matters.

Report excerpt

Untreated early reflections from side walls and floor

What you hear right now (without treatment):
Stereo imaging is less stable than it should be, and some mid/high content sounds “phasey,” sharp, or smeared-especially on dense mixes-because early reflections are combining with the direct sound and creating comb filtering.

Why this room has it:
In a room this size, the side walls and ceiling are close enough that reflections arrive only a few milliseconds after the direct sound-well within the time window where your brain merges them with the direct sound.

How the treatment addresses it (and why it works):

  • Two broadband side‑wall panels at the first‑reflection areas (one on Wall B, one on Wall D, with ~5 cm air gap): Porous absorption placed at the reflection points reduces reflection amplitude across the critical mid/high bands (roughly the range where localization and clarity cues live).
  • A ceiling cloud over the listening area for L/C/R ceiling reflections (with ~10 cm air gap): This targets one of the strongest reflection paths in small rooms: the ceiling bounce. The air gap increases effectiveness lower in frequency than a flush-mounted thin panel.

What to expect:
A strong improvement in phantom center stability, clearer panning, and less high‑frequency “hash.” You should also notice that small EQ moves are easier to judge because the direct sound is less “modulated” by early comb filtering.
How it works

A tape measure, a focused conversation, no microphone

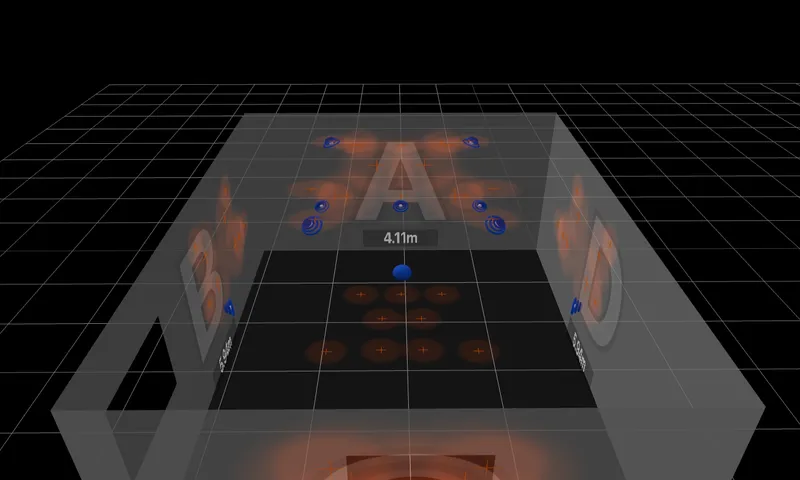
You describe the room. The assistant works through four stages, showing results after each. You can adjust anything that doesn't fit reality, and the assistant recalculates around your constraints.

  1. 01 No measurement microphone

    A tape measure is enough to get started.

  2. 02 Adjust as you go

    If you can't place a speaker that close to a window, say so. The assistant works around the constraint while keeping the stereo angle and Atmos spec intact.

  3. 03 Confirm visually

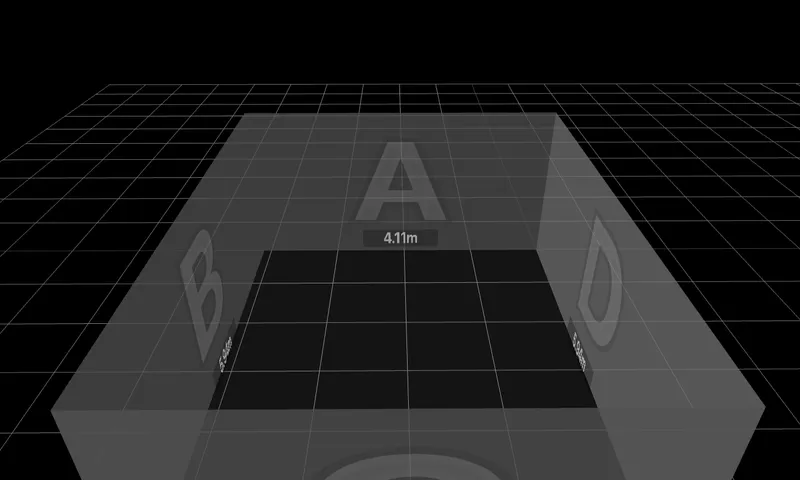
    A 3D view of the room updates as you describe it, so you can verify everything before you trust the analysis.

  4. 04 Stage-by-stage results

    After each stage you see findings and decide what to fix before moving on.

Acoustic Assistant workflow

How it's different

Most tools treat your room as a textbook problem. Yours is not.

Forum advice ignores your constraints. Calculators ignore tradeoffs. The Acoustic Assistant designs speaker placement and treatment together, for your room's actual geometry.

Forums

"Just put bass traps in the corners and call it a day."

  • Doesn't know your room shape
  • Doesn't account for door, window, or HVAC
  • One-size-fits-all advice
  • Conflicting opinions, no resolution

Calculators

"Here are your modal frequencies. Good luck."

  • Treats your room as a perfect rectangle
  • Calculates one variable at a time
  • Doesn't tell you what to do
  • No placement, no tradeoffs, no priority
this

Acoustic Assistant

"Move the seat 22cm forward, treat the right wall first."

  • Works with your actual room geometry
  • Places speakers and treatment together
  • Names every problem and its priority
  • Explains every decision in plain language

What it doesn't do (yet)

An honest list of limits

We'd rather tell you up-front than oversell. Here's what's not in this version.

Geometry-driven, not measured

We model the physics of your room from its dimensions and your description. Importing acoustic measurements is on the roadmap.

Limited support for complex shapes

Rectangular rooms are most accurate. Alcoves, soffits, and other irregularities work with reduced accuracy. Sloped ceilings are not yet supported.

A starting point, not a final tune

Speaker positions and treatment placement are a strong baseline derived from your room geometry. For critical mastering rooms and commercial builds, acoustic measurements let you fine-tune from there.

Why it exists

Two decades ago I built my own recording studio and went down a deep rabbit hole teaching myself room acoustics along the way. When I moved into a new apartment, I set up the listening room by intuition and figured I'd done as well as the shape allowed. Then I visited a professionally designed studio and realized how much I'd missed.

I tried ChatGPT. Some of its ideas were solid, others were confidently wrong. So I spent the past year building this: an assistant grounded in room acoustics physics, not AI slop.


Stefan Founder

Get early access

Get your room right before you mix one more track.

We're opening access to a small group of users soon. Sign up and we'll notify you when it's your turn.